 Mini Review
Orthopedic Casting Removal: Quick Techniques
Orquidea Navarro1*, Mitchell Goldflies2, Vikrant Azad3 and Ly Ton4
1Registered Nurse, Department of Orthopedic at Saint Anthony Hospital, USA
2Chief of Orthopedic Surgery Department of Saint Anthony Hospital, USA
3Staff Orthopedic Surgeon at Saint Anthony Hospital in Affiliation with University of Chicago Medicine, USA
4Medicine Doctor, Graphic contributor, USA
Orquidea Navarro, Registered Nurse, Department of Orthopedic at Saint Anthony Hospital, USA.
Received Date: January 18, 2021; Published Date: January 27, 2021
Mini Review
Treating a fracture with a cast made of plaster of Paris or fiberglass to immobilize the injured tissue has been used for many years and is still the leading practice in the orthopedic field [1]. However, there are few published resources that assist health care providers in easing this process. The improper use of the cast saw may lead to different types of skin injuries that are seen more often in patients with fragile skin such as children and elderly patients. Although applying casting and cast removalare thought to be low risk standard procedures, improper usage of the cast saw can potentially lead to injuries that are thermal or abrasive (or both) in nature [2]. Friction between the cast and the saw blade causing blade temperatures above 50°C results in thermal injury to dermal tissue [3]. Abrasive injuries occur when downward pressure is applied to the cast saw while the skin is taut or immobile [2]. The purpose of this paper is to explore an easier casting removal technique of short-leg and long-arm casts aiming to report a novel technique that is easier for the individual removing the cast and will lead to fewer complications of cast removal.
Easy | Quick | Techniques:
Step By Step:
Short Leg Cast Removal:

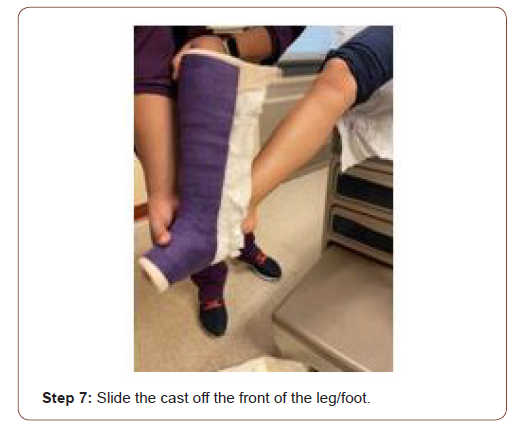
Easy | Quick | Techniques:
Step By Step:
Long Arm Cast Removal:
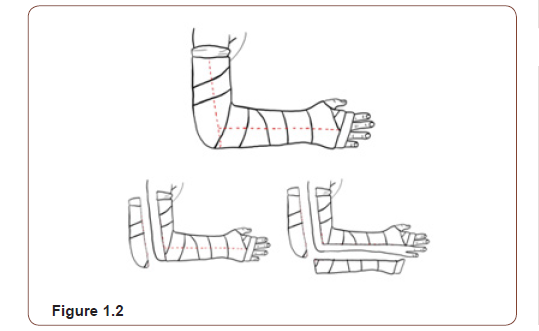
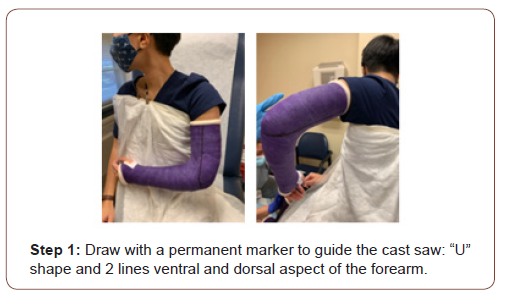
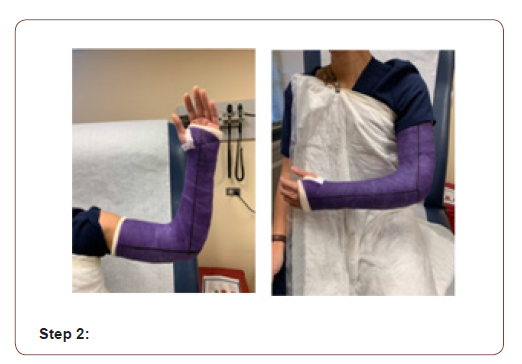
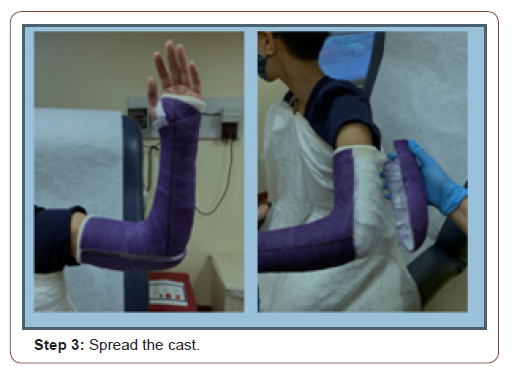
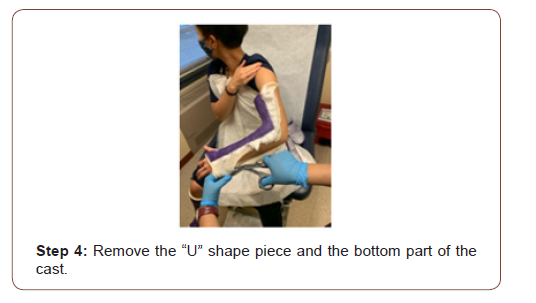
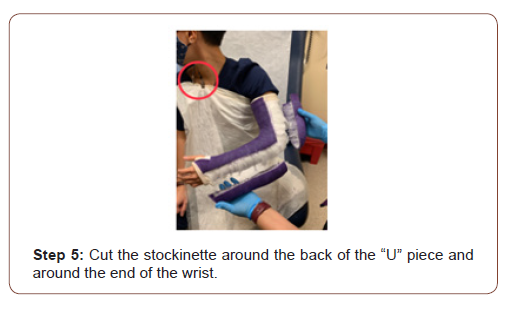
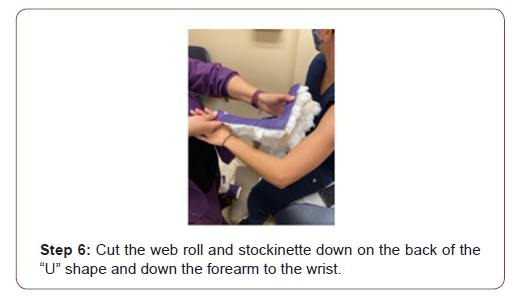
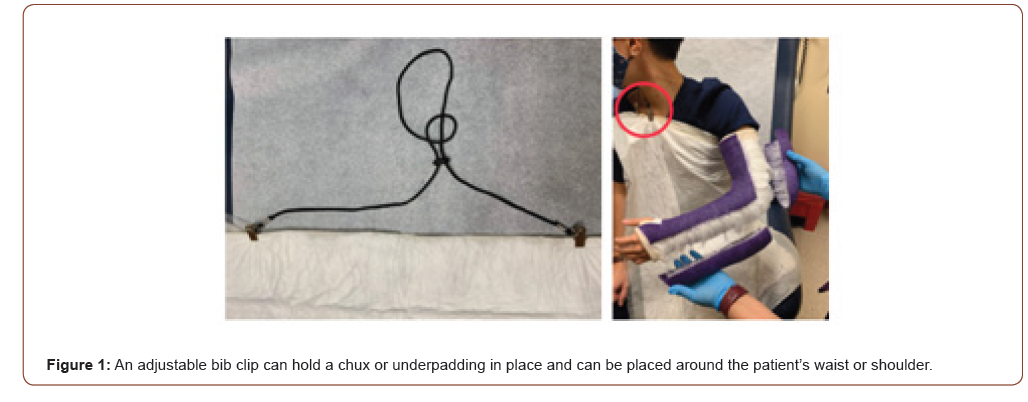
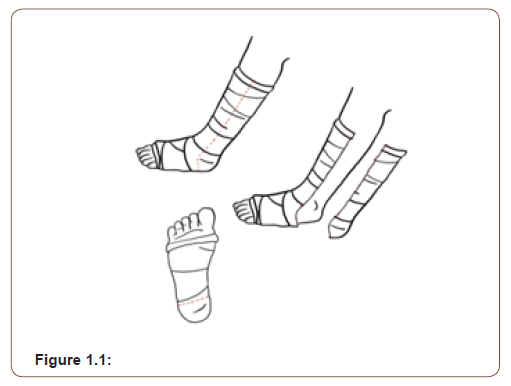
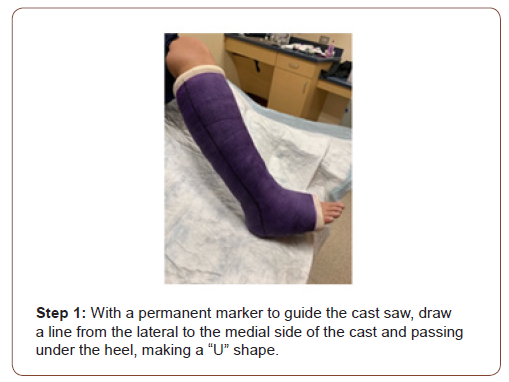
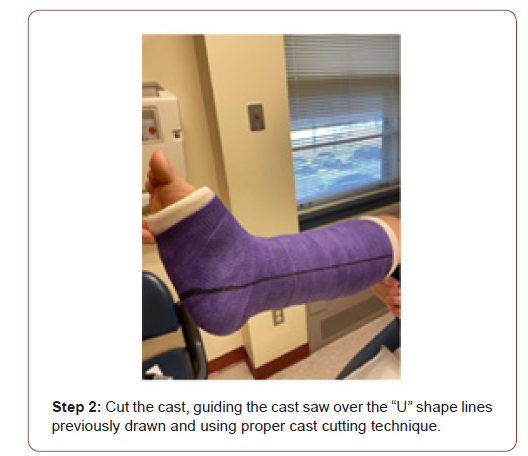
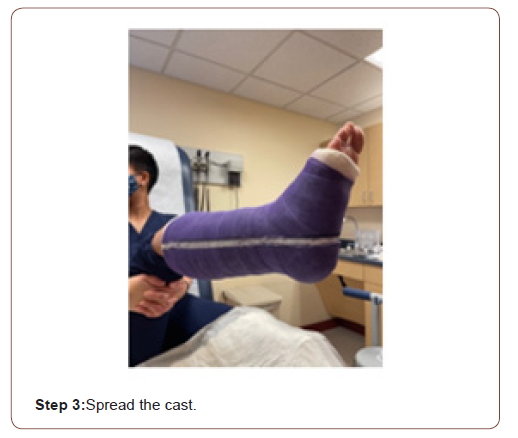
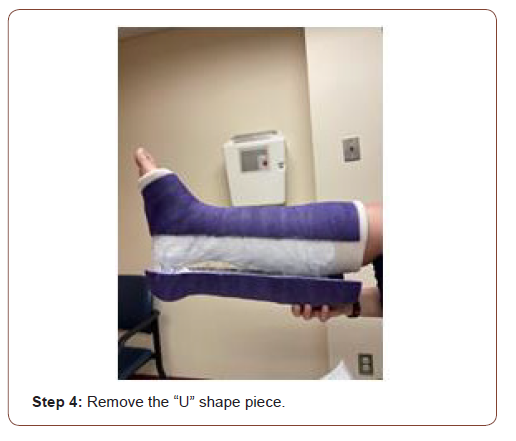
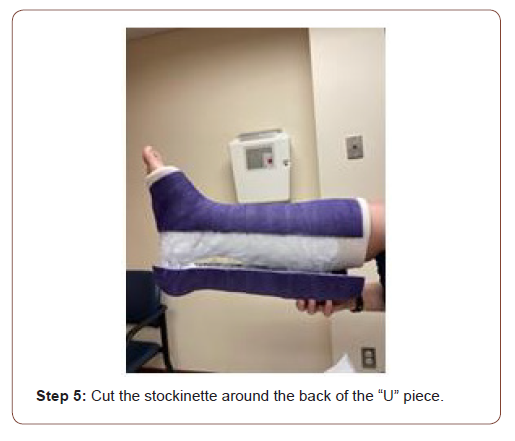
The following new cast removal technique is proposed by the senior author (MG) who has used it for many years in his practice. He suggests the use of practical solutions to our everyday struggle to casting removal, especially in busy environments. First, the use of a permanent marker to guide the user of the cast saw in cutting the cast appropriately. Second,the use of an adjustable bib clip to hold a chux or underpadding onto the patient. The bib clips help to avoid the underpadding to slide or fall while applying or cutting cast (Figure 1). Nevertheless, the casting saw should be held appropriately with a firm grip and with placement of your index finger on the surface of the cast as a stabilization point while cutting. Then, the saw is used with oscillating movements (rocking), perpendicular (90º), and “in-out technique” from the cast surface to avoid thermal/abrasive injuries [2].Third, the senior author proposes a new technique to cut casts that cover the elbow joint such as long-arm-cast, and the ankle joint such as short/longleg- cast. The use of a “U” shaped cut is recommended instead of an “L” cut. Using a permanent marker, first draw a “U” shape line around the leg or the upper arm from lateral to medial aspect and passing under heel or under the elbow (and 2 lines ventral and dorsal aspect of the forearm) depending on which cast is being cut (Figures 2.1 & 2.2, Steps 1-3). After cutting the cast, remove the back portion that was cut, and then proceed to cut the remaining of the forearm if cutting a long-arm cast (Steps 4-5). Then remove the under-casting materials (webroll) and cut the stockinette only at the posterior area where the first piece of cast was removed (Step 6). Lastly, slide the remaining cast off the front of the leg and foot or arm (Step 7) (Figure 1).
Additional Recommendations
• The under-casting materials (stockinette and web roll) should be sufficient to avoid abrasions to the skin from the cast saw. However, it is recommended that the under-casting material is visible, and the amount is sufficient enough to support the cast removal process.
• When cutting the stockinette, the bandage shears should avoid touching the skin of the patient. Pulling the stockinette or guiding your finger under the stockinette helps to separate the stockinette from the patient’s skin.
• The vacuum system from the cast saw should be turn “on” to decrease the spread of dust.
Other recommendations when removing casts from children
The removal of a cast in children can induce high levels of anxiety and it is important to discuss additional steps in order to prevent potential injuries caused by improper handling of the saw [3]. When treating children (ages: infant to 5 yrs), it is important to have the help of a caregiver, usually one of the parents. Discussing the steps of the procedure and asking if the child agrees to participate helps to ease the patient’s anxiety. The first step would be to advise the child about the loud noise made by the saw. When the child agrees to participate, turn the saw on for the patient to hear the loud noise it produces. Advise the child that the saw cuts through vibrations and you may even demonstrate the procedure on your own palm (this is the safer location to avoid burning your own skin). Lastly, start cutting with a firm grasp on the saw, as the child might jump or pull the limb away when they feel the oscillating sensation. Furthermore, it is beneficial for smaller kids to be on one of the parent’s lap during the procedure.
Discussion
The benefits of cutting the cast in a “U” shape, from a posterior approach, rather than a traditional “L” shape are for safety purposes, especially in teaching environments. On a long-arm cast, cutting the posterior part of the cast in a “U” shape will prevent the individual cutting the cast from approaching the cut from the antecubital fossa (front of the arm). This area (radial border) becomes the thickest part due to the cast materials covering the back of the elbow but overlapping at the antecubital fossa. The longer the cast saw is held in one position to cut through the cast, the greater the risk for skin injury. Furthermore, on a short-leg cast, cutting the posterior part of the cast in a “U” shape will prevent the saw from coming close to the toes, which seems to be a sensitive area for most patients. In addition, many patients present to clinic with the frontal areas of their cast damaged making it more difficult to cut the cast in this area.The “U” cutting technique avoids this area.
Acknowledgement
The authors would like to thank Saint Anthony Hospital and Sherrie Spencer, AGNP, MSN, BSN, RN, Vice President of Patient Care and Chief Nursing Officer at Saint Anthony Hospital for supporting the publication of this article.
Reviewers
Douglas Dirschl, Vikrant Azad, Ly Ton Orthopedic Surgeon at Saint Anthony Hospital.

Table 1: Summary of complication and their incidence rate [16-22].

References
- Altizer L (2004) Casting for immobilization. Orthop Nurs 23(2):136-41.
- Halanski M (2016) How to Avoid Cast Saw Complications. Journal of Pediatric Orthopaedics 36: S1-S5.
- Katz K, Fogelman R, Attias J, Baron E, Soudry M (2001) Anxiety reaction in children during removal of their plaster cast with a saw. J Bone Joint Surg Br 83(3): 388-390.
-
Orquidea Navarro, Mitchell Goldflies, Vikrant Azad, Ly Ton. Orthopedic Casting Removal: Quick Techniques. Glob J Ortho Res. 2(5): 2021. GJOR.MS.ID.000550.
-
Orthopedic Casting Removal, Fiberglass, Children, Elderly patients, Fragile skin, Friction, Cast, Saw blade, Temperature, Thermal injury, Dermal tissue
-

This work is licensed under a Creative Commons Attribution-NonCommercial 4.0 International License.


